Let’s encrypt is a widely used, free TLS certificate provider. OpenBSD’s base system comes with everything needed to setup a basic secure web server, including:
- httpd(8): a HTTP server;
- relayd(8): a load-balancer, gateway, etc.;
- acme-client(1): an ACME client, to manage TLS certificates.
This article will start by building a few simple sample setups. The goal being to make sure that the configuration is fully understood, and not something that happens to work “by accident”.
Then, we’ll quickly present how to fully automate the certificates renewal/acquisition with sugar(1), a small (~150LOC shell) remote server administration tool. Code for the final automated setup is available here.
Note: This article is most suitable for people with limited experience with OpenBSD. For a more succinct approach, see this blog post by Roman Zolotarev.

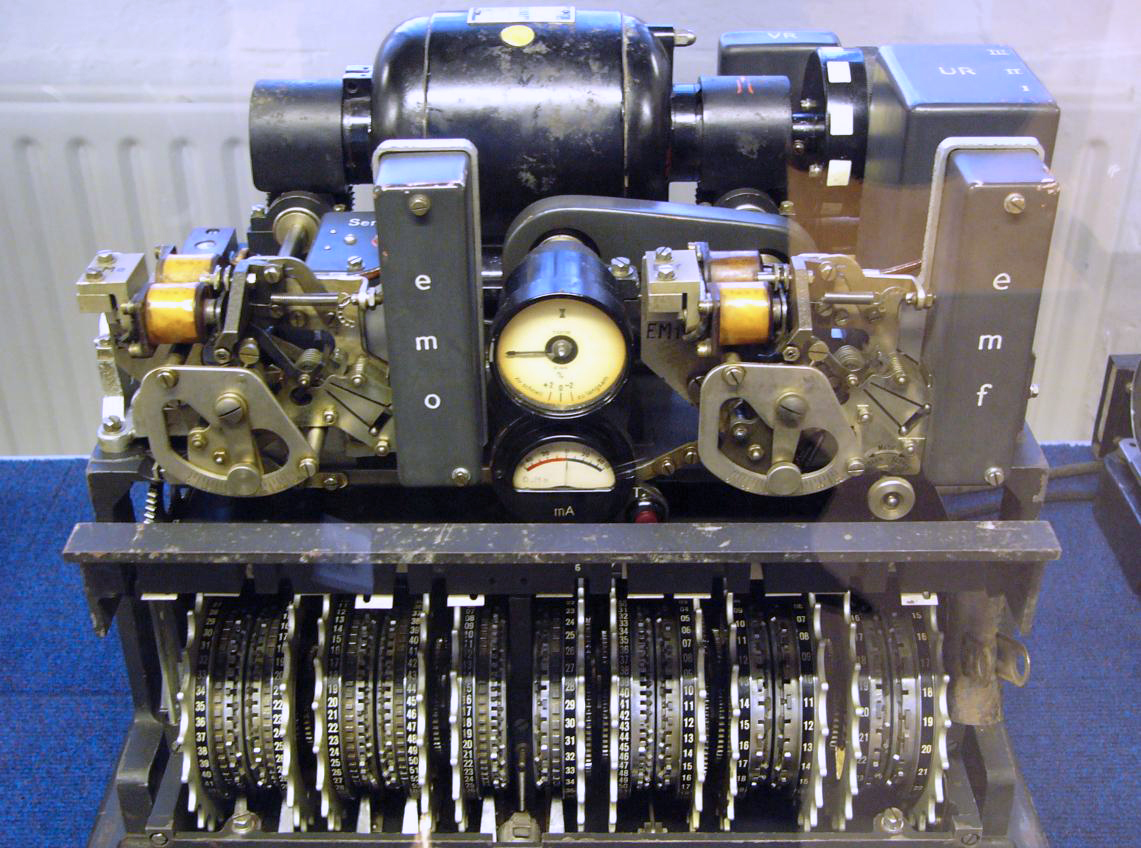
An Enigma machine, extensively used by the Nazis during WWII by Alessandro Nassiri through wikimedia.org – CC-BY-SA-4.0
VM(s)
A local VM will help with testing and evaluating intuitions, but likely won’t be sufficient to test everything. The two following articles can serve as reference for installing OpenBSD on qemu(1):
I’ll be using this script, based on skreutz.com/posts/autoinstall-openbsd-on-qemu/, and this script to setup a bridged TAP interface, thus providing the VM with a “real” IP address.
Furthermore, a “domain name” can be provided via the /etc/hosts
file (hosts(5)):
192.168.42.190 obsdvmTLS 101
Some basic knowledge of SSL/TLS will be useful; some peculiar details could be also be of interest. See for instance:
- Wikipedia:
- Stackexchange, superuser, etc.
Staging, production
Let’s encrypt provides two environment:
- a staging one;
- a production one.
The staging environment has greater rates limits, thus is more forgiving, which is rather relevant for bootstrapping an automated setup.
SSL handling: relayd(8) or httpd(8)
SSL (TLS really) certificates can be handled by either relayd(8), or by httpd(8). When performed solely in the later, bear in mind that, as HTTP(s) requests would be encrypted, relayd(8) would be limited (e.g. impossible to set cache parameters for static files).
Note: The traffic can be decrypted by relayd(8) and re-encrypted when sent to httpd(8); this will be demonstrated in one of the sample setup.
Sample setup n°1: self-signed certificate, httpd(8)
We’ll slowly build a few different sample setups, from simple to more complex, before moving on to a fully automatic setup.
The first thing we’ll need is a way to create a self-signed certificate. We’ll use openssl(1), conveniently wrapped in a function, so as to avoid overriding existing certificates by default, as we’ll still be using this code later to bootstrap Let’s Encrypt. The default paths will match conventions followed by relayd(8) and httpd(8).
mksscert() {
	if [ "$1" = "-f" ]; then force=1; shift; fi
	if [ "$1" = "-g" ]; then go=1;    shift; fi

	key=$2
	crt=$3

	if [ -z "$2" ]; then key=/etc/ssl/private/$1.key; fi
	if [ -z "$3" ]; then crt=/etc/ssl/$1.crt;         fi

	if [ -e "$key" ] || [ -e "$crt" ]; then
		if [ -n "$go" ]; then
			return
		fi
		if [ -z "$force" ]; then
			fail "Either $key or $crt exist for domain $1, -f missing"
		fi
	fi

	quietrun openssl req -x509 -newkey rsa:4096 \
		-days 365 -nodes                        \
		-subj '/CN='$1                          \
		-keyout $key                            \
		-out    $crt

	# OpenBSD's httpd(8)/relayd(8) won't start with relaxed
	# permissions
	chmod 600 $key
	chmod 444 $crt
}
Note: quietrun is a simple function from
sugar.lib, which executes a command silently while capturing
its output; were the command to fail, output would be displayed:
# Quietly run given command; in case of error,
# output everything and exit
#
# Input:
#	$* : command to run
quietrun() {
	fn=/tmp/quietrun.$$
	if ! $* > $fn 2>&1; then cat $fn; rm $fn; exit 1; fi
	rm $fn
}
We now need a way to instruct httpd(8) to use such certificates: looking at httpd.conf(5):
DESCRIPTION
	If `*' is given as an address, httpd(8) will listen on all
	IPv4 and IPv6 addresses.  0.0.0.0 means to listen on all IPv4 addresses
	and :: all IPv6 addresses.  A port can be specified by number or name.
	The port name to number mappings are found in the file /etc/services; see
	services(5) for details.

...

GLOBAL CONFIGURATION
	Here are the settings that can be set globally:

	chroot directory
		Set the chroot(2) directory.  If not specified, it defaults to
		/var/www, the home directory of the www user.

...

SERVERS
	The configured web servers.

	Each server section starts with a declaration of the server name:

	server name {...}
		Match the server name using shell globbing rules. This can be an
		explicit name, www.example.com, or a name including wildcards,
		*.example.com.

	...

	listen on address [tls] port number
		Set the listen address and port. This statement can be specified multiple times.

	...

	root directory
		Configure the document root of the server.  The directory is a
		pathname within the chroot(2) root directory of httpd.  If not
		specified, it defaults to /htdocs.

	tls option
		Set the TLS configuration for the server. These options are only used if
		TLS has been enabled via the listen directive. Multiple options may be
		specified within curly braces. Valid options are:

		certificate file
			Specify the certificate to use for this server. The file should contain
			a PEM encoded certificate. The default is /etc/ssl/server.crt.

		...

		key file
			Specify the private key to use for this server. The file should contain
			a PEM encoded private key and reside outside of the chroot(2) root
directory of httpd. The default is /etc/ssl/private/server.key.Note: The default path for the certificate and keys are literal,
i.e. /etc/ssl/private/server.key, not /etc/ssl/private/$server.key for
some value of $server; it’s unrelated to the name of the
server "$server" {} block.
Thus, the simplest option would be to generate a pair of .crt/.key pointing
to the default locations:
# Remember the default locations for key/crt of mksscert are:
#	/etc/ssl/private/$1.key
#	/etc/ssl/$1.crt
(root)% mksscert server
With a httpd.conf such as:
server "obsdvm" {
	listen on * tls port 443
}
Or, equivalently, by expliciting some of the default values described in the man page:
chroot "/var/www"

server "obsdvm" {
	listen on * tls port 443

	tls certificate "/etc/ssl/server.crt"
	tls key         "/etc/ssl/private/server.key"

	root "/htdocs"
}
This can be tested by storing a test file to /var/www/htdocs/test.html,
with a curl -k https://$hostname/test.html. Don’t forget:
- to make sure the relevant port is open (pf.conf(5));
- to enable httpd(8) (rc.conf.local(8),
rcctl(8)):
rcctl enable httpd; - to reload httpd(8) after having adjusted its configuration:
rcctl restart httpd.
A german Lorenz cipher, used by the Wehrmacht during WWII
by
Matt “Crypto”
Sample setup n°2: self-signed certificate, relayd(8)
As TLS will be managed by relayd(8), httpd(8) can now listen on a random port, with TLS disabled. That port doesn’t need (shouldn’t) be opened to the outside world (you may want to adjust your pf.conf(5)):
server "obsdvm" {
	listen on * port 8080
}
We can use the same certificates as before, eventually renaming them. Looking at relayd.conf(5):
DESCRIPTION

	Relays
		Relays allow application layer load balancing, TLS acceleration,
		and general purpose TCP proxying on layer 7.

	Protocols
	      Protocols are predefined settings and filter rules for relays.

	...

RELAYS
	Relays will forward traffic between a client and a target server.  In
	contrast to redirections and IP forwarding in the network stack, a relay
	will accept incoming connections from remote clients as a server, open an
	outgoing connection to a target host, and forward any traffic between the
	target host and the remote client, operating on layer 7.  A relay is also
	called an application layer gateway or layer 7 proxy.

	The main purpose of a relay is to provide advanced load balancing
	functionality based on specified protocol characteristics, such as HTTP
	headers, to provide TLS acceleration and to allow basic handling of the
	underlying application protocol.

	...

	[transparent] forward [with tls] to address [port port] options ...
		Specify the address and port of the target host to connect to.
		If the port option is not specified, the port from the listen on
		directive will be used.  Use the transparent keyword to enable
		fully-transparent mode; the source address of the client will be
		retained in this case.

		The with tls directive enables client-side TLS mode to connect to
		the remote host.  Verification of server certificates can be
		enabled by setting the ca file option in the protocol section.

	listen on address port port [tls]
		Specify the address and port for the relay to listen on.  The
		relay will accept incoming connections to the specified address.
		If the tls keyword is present, the relay will accept connections
		using the encrypted TLS protocol.

TLS RELAYS
	In addition to plain TCP, relayd(8) supports the Transport Layer
	Security (TLS) cryptographic protocol for authenticated and encrypted
	relays. TLS is the successor of the original Secure Sockets Layer
	(SSL) protocol, but the term SSL is sometimes still used in modern
	TLS-based applications. relayd(8) can operate as a TLS client or server
	to offer a variety of options for different use cases related to TLS.

	...

	TLS server
		When specifying the tls keyword in the relay listen statements,
		relayd(8) will accept connections from clients as a TLS server.
		This mode is also known as “SSL/TLS acceleration”. See the listen on
		description in the RELAYS section for more details.

	...

PROTOCOLS

	...

	tls option
		Set the TLS options and session settings.  This is only used if
		TLS is enabled in the relay.  Valid options are:

		...

		keypair name
			The relay will attempt to look up a private key in
			/etc/ssl/private/name:port.key and a public certificate
			in /etc/ssl/name:port.crt, where port is the specified
			port that the relay listens on.  If these files are not
			present, the relay will continue to look in
			/etc/ssl/private/name.key and /etc/ssl/name.crt.  This
			option can be specified multiple times for TLS Server
			Name Indication.  If not specified, a keypair will be
			loaded using the specified IP address of the relay as
			name.  See ssl(8) for details about SSL/TLS server
			certificates.

		...

		no tlsv1.3
			Disable the TLSv1.3 protocol.  The default is to enable
			TLSv1.3.

		no tlsv1.2
			Disable the TLSv1.2 protocol.  The default is to enable
			TLSv1.2.

		sslv3   Enable the SSLv3 protocol.  The default is no sslv3.

		tlsv1   Enable all TLSv1 protocols.  This is an alias that
			includes tlsv1.0, tlsv1.1, tlsv1.2, and tlsv1.3.  The
			default is no tlsv1.

		tlsv1.0
			Enable the TLSv1.0 protocol.  The default is no tlsv1.0.

		tlsv1.1
			Enable the TLSv1.1 protocol.  The default is no tlsv1.1.
From which we can derive the following configuration, re-using our previous
.crt/.key pair:
http protocol "https" {
	tls keypair server
}

relay "www" {
	listen on 0.0.0.0 port 443 tls
	protocol "https"
	forward to 127.0.0.1 port 8080
}
By default, relayd(8) will look for certificates/key respectively in:
/etc/ssl/$relay-ip.crt/etc/ssl/private/$relay-ip.key
Where $relay-ip in our case would be 0.0.0.0. Thus were we
to ln(1)/cp(1) our current certificate/key to such locations:
(root)% cp /etc/ssl/server.crt         /etc/ssl/0.0.0.0.crt
(root)% cp /etc/ssl/private/server.key /etc/ssl/private/0.0.0.0.key
The configuration would then be equivalent to:
relay "www" {
	listen on 0.0.0.0 port 443 tls
	forward to 127.0.0.1 port 8080
}
Indeed, when tls is specified on listen on ..., some default
TLS options (e.g. tlsv1.3) will be enabled, and will trigger the search
for the 0.0.0.0.key/0.0.0.0.crt; there’ll be no need to specify
an additional empty protocol.
Again, don’t forget:
- to enable relayd(8) (rc.conf.local(8),
rcctl(8)):
rcctl enable relayd, - to restart httpd(8) to use the new configuration:
rcctl restart httpd; - to restart relayd(8):
rcctl restart relayd
Note: Again with a curl(1) based test, we can make sure that the traffic indeed goes through relayd(8) instead of httpd(8), for instance by blocking a special path in relayd.conf(5):
http protocol "https" {
	tls keypair server
	block path "/test2.html"
}

...
local$ curl -s -k -I https://obsdvm/test.html| sed 1q
HTTP/1.1 200 OK
local$ curl -s -k -I https://obsdvm/not-found.html | sed 1q
HTTP/1.0 404 Not Found
local$ curl -s -k -I https://obsdvm/test2.html; echo $?
52We can look in /var/www/logs/access.log to ensure the traffic
does go to httpd(8).
...
obsdvm 127.0.0.1 - - [30/May/2022:22:38:01 +0200] "HEAD /test.html HTTP/1.1" 200 21
obsdvm 127.0.0.1 - - [30/May/2022:22:38:02 +0200] "HEAD /not-found.html HTTP/1.1" 404 0
...
We can also use
tcpdump(8) to inspect the traffic between relayd(8) and
httpd(8); make sure you listen on lo0 and not on the default
network interface:
obsd# tcpdump  -i lo0 "port 8080"
tcpdump: listening on lo0, link-type LOOP
22:40:12.310631 localhost.12107 > localhost.8080: S 799138524:799138524(0) win 16384 <mss 32728,nop,nop,sackOK,nop,wscale 6,nop,nop,timestamp 2070477975 0> (DF)
22:40:12.310648 localhost.8080 > localhost.12107: S 2903594924:2903594924(0) ack 799138525 win 16384 <mss 32728,nop,nop,sackOK,nop,wscale 6,nop,nop,timestamp 3498515451 2070477975> (DF)
22:40:12.310658 localhost.12107 > localhost.8080: . ack 1 win 256 <nop,nop,timestamp 2070477975 3498515451> (DF)
22:40:12.311330 localhost.12107 > localhost.8080: P 1:271(270) ack 1 win 256 <nop,nop,timestamp 2070477975 3498515451> (DF)
22:40:12.311344 localhost.8080 > localhost.12107: . ack 271 win 251 <nop,nop,timestamp 3498515451 2070477975> (DF)
22:40:12.312187 localhost.8080 > localhost.12107: P 1:128(127) ack 271 win 256 <nop,nop,timestamp 3498515451 2070477975> (DF)
...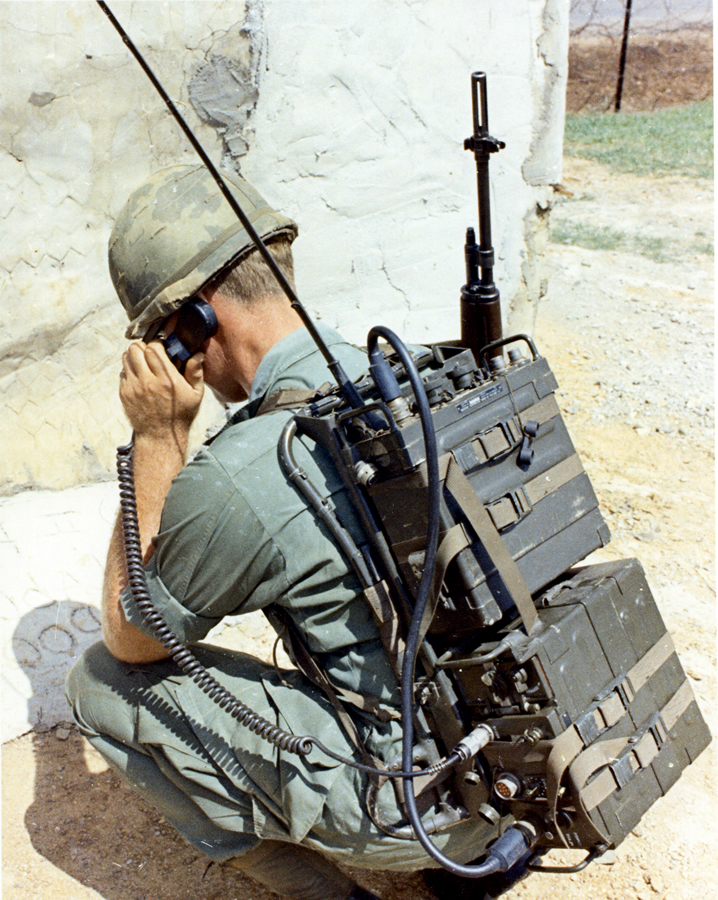
USA soldier using the KY38 ‘Manpack’, part of the NESTOR project by NSA through wikimedia.org – Public domain
Sample setup n°3: self-signed certificate, relayd(8) & httpd(8)
For now, the link between relayd(8) and httpd(8) isn’t encrypted, but it could be: continuing in relayd.conf(5):
TLS RELAYS
	TLS client
		When configuring the relay forward statements with the with tls
		directive, relayd(8) will enable client-side TLS to connect to the
		remote host. This is commonly used for TLS tunneling and transparent
		encapsulation of plain TCP connections. See the forward to description
		in the RELAYS section for more details.

	...

	TLS client and server
		When combining both modes, TLS server and client, relayd(8) can filter
		TLS connections as a man-in-the-middle. This combined mode is also
		called “TLS inspection”. The configuration requires additional
		X.509 certificate settings; see the ca key description in the
		PROTOCOLS section for more details.

	When configured for “TLS inspection” mode, relayd(8) will listen for
	incoming connections which have been diverted to the local socket by PF
	Before accepting and negotiating the incoming TLS connection as a server,
	it will look up the original destination address on the diverted socket,
	and pre-connect to the target server as a TLS client to obtain the remote
	TLS certificate. It will update or patch the obtained TLS certificate by
	replacing the included public key with its local server key because it
	doesn't have the private key of the remote server certificate. It also
	updates the X.509 issuer name to the local CA subject name and signs the
	certificate with its local CA key. This way it keeps all the other X.509
	attributes that are already present in the server certificate, including
	the "green bar" extended validation attributes. Now it finally accepts
	the TLS connection from the diverted client using the updated certificate
	and continues to handle the connection and to connect to the remote server.

PROTOCOLS

	...

	tls option
		Set the TLS options and session settings.  This is only used if
		TLS is enabled in the relay.  Valid options are:

		ca cert path
			Specify a CA certificate for TLS inspection.  For more
			information, see the ca key option below.

		ca file path
			This option enables CA verification in TLS client mode.
			The daemon will load the CA (Certificate Authority)
			certificates from the specified path to verify the server
			certificates.  OpenBSD provides a default CA bundle in
			/etc/ssl/cert.pem.

		ca key path password password
			Specify a CA key for TLS inspection.  The password
			argument will specify the password to decrypt the CA key
			(typically an RSA key).  This option will enable TLS
			inspection if the following conditions are true:

				o   TLS server mode is enabled by the listen
				    directive: listen on ... tls.
				o   TLS client mode and divert lookups are enabled
				    by the forward directive: forward with tls to
				    destination.
				o   The ca cert option is specified.
				o   The ca key option is specified.
One implementation is rather straightforward: httpd.conf(5)
server "obsdvm" {
	listen on * tls port 8080

	tls certificate "/etc/ssl/obsdvm.crt"
	tls key         "/etc/ssl/private/obsdvm.key"

	root "/htdocs"
}
And relayd.conf(5):
http protocol "https" {
	tls keypair server
	block path "/test2.html"
}

relay "www" {
	listen on 0.0.0.0 port 443 tls
	protocol "https"
	forward with tls to 127.0.0.1 port 8080
}
We can generate a distinct set of .crt/.key, or use the same, both
would work. Again, we can use the same testing protocol as before,
block path /test2.htmlin relayd.conf(5);/var/www/logs/access.log;- tcpdump(8).
Main setup: CA-signed certificates, multiple domains (SNI), relayd(8)+httpd(8)
Network flow
We’ll use a full HTTPs setup. Mixed access could be provided,
but things are overall better/simpler with everything encrypted.
Port 80 is still opened, but only for redirection to port 443.
Furthermore, as I need caching and other relayd(8) features, I will handle TLS from relayd(8), while leaving out encryption between relayd(8) and httpd(8), though this would be trivial to add given the previous example.
This gives us the following network configuration:
- relayd(8) listens on port
443; - httpd(8) listens on both:
- port
8080, where it receives decrypted TLS traffic from relayd(8). pf(8) prevents direct access to this port from the outside world; - port
80, where all requests will be permanently redirected (HTTP 301) to theirhttpscounterpart, on port443.
- port
General TLS configuration
Previous sample setups were automated with sugar(1), but the details have been left aside for clarity, or as an exercise to the reader. We’ll set things up with sugar(1) here too, but this time all the relevant code/data will be available.
The first thing we’ll want to do is to define a configuration file format to represent all the available domains, that will be used in multiple ways by various scripts:
- to generate some parts of acme-client.conf(5) configuration file(s);
- to generate some parts for httpd.conf(5), for each
existing domain/subdomain, with:
/.well-known/acme-challenge/*sections, used by acme-client(1) to allow external actors (CA such as Let’s Encrypt) to verify we do own the domains we try to generate certificates for; - Temporary TLS certificates to bootstrap relayd(8) and
the various
tls keypairentries needed. The temporary certificates are used so that relayd(8) will start even if we don’t have proper, CA-signed certificates: it will fail to start if it finds atls keypair example.comand no certificates forexample.comon the filesystem, which will obviously happen before we register any Let’s Encrypt certificates. - etc.
The configuration needs to describe each domain and their associated subdomains, if any:
# <main-domain> [<list of subdomains>]
example.com dev.example.com test.example.com www.example.com

# Random comment after an ignored empty line
example.com         dev.example.com         git.example.com          bar.example.com
httpd(8)
For each domain/subdomain, we’ll want an httpd.conf(5) entry such as:
server "dev.example.com" {
	listen on 127.0.0.1 port 8080
	log style forwarded

	# acme-client(1) challenges default directory
	location "/.well-known/acme-challenge/*" {
		root "/acme"
		request strip 2
	}

	# Subdomain-specific configuration; empty files
	# will be automatically created when nothing is
	# needed
	include "/etc/httpd/dev.example.com.conf"
}
All the /etc/httpd/$x.conf files will be installed from
$SUGARD/httpd/$x.conf, and preprocessed with sugar’s
““templating system””.
We’ll redirect all (IPv4) HTTP traffic to HTTPs with this single entry:
server "http-to-https" {
	listen on 0.0.0.0 port 80
	log style forwarded
	block return 301 "https://$HTTP_HOST$REQUEST_URI"
}
Instead of having one entry per domain/subdomain such as:
server "dev.example.com" {
	listen on 0.0.0.0 port 80
	log style forwarded
	block return 301 "https://dev.example.com$REQUEST_URI"
}Note: The code follows slightly different yet equivalent conventions.

A Navajo I phone built by the NSA, typically used by senior government officials by Mike Newton through wikimedia.org – CC-BY-SA-3.0
acme-client(1)
We’ll need to define a certificate authority, typically:
authority letsencrypt {
	api     url "https://acme-v02.api.letsencrypt.org/directory"
	account key "/etc/acme/letsencrypt-privkey.pem"
}
We’ll also need to define another entry, for the staging environment:
authority letsencrypt-staging {
	api     url "https://acme-staging-v02.api.letsencrypt.org/directory"
	account key "/etc/acme/letsencrypt-staging-privkey.pem"
}
Note: The account keys /etc/acme/*.pem are automatically
managed by acme-client(1).
We’ll install the same certificate for a domain and its subdomain. There are pros-and cons to this approach; for more, see the already mentioned:
- Does each subdomain need it’s own SSL certificate?
- Benefits of a wildcard vs per-subdomain certificates?
For each domain, we’ll then need entries such as:
domain example.com {
	alternative names             { dev.example.com, test.example.com  }
	domain key                    "/etc/ssl/private/example.com.key"
	domain full chain certificate "/etc/ssl/example.com.crt"
	sign with                     letsencrypt
}
Note: The .crt/.key locations aren’t random: they match those
expected by tls keypair example.com in relayd.conf(5).
We’ll generate two nearly identical files, that will only differ in
that every domain in the *-staging.conf file will be signed
with letsencrypt-staging instead of letsencrypt.
acme-client.conf;acme-client-staging.conf.
The former will be installed to /etc/acme-client.conf upon successful
certificates acquisition.
relayd(8)
We’ll just need to find a way to inject, for each $domain, a
tls keypair $domain line of a protocol in relayd.conf(5).
This can be implemented by generating those lines and storing them in a
file /etc/relayd/tls.conf, to be included with an include from
/etc/relayd.conf.
Certificate acquisition process
One of the first think we’ll need is the ability to distinguish what kind of certificate is currently installed on a domain. There are four main cases:
- No certificates installed;
- Self-signed certificates, that we’ll install just so that
relayd(8) can start, as it would fail to do so given
the
tls keypair $nameentries, and the lack of CA-signed certificates; - Let’s Encrypt Staging certificates;
- Regular Let’s Encrypt certificates.
The check can be performed, as for the self-signed certificates generation, with openssl(1):
gettlsissuer() {
#	curl -A "curl-sugar-tests" --insecure -vvI https://$1 2>&1 | grep '^\*  issuer:'
	openssl s_client -showcerts -connect $1:443 2>&1 | grep '^issuer'
}
From there, the process will be, for each domain/subdomain:
- If we have no certificates, install self-signed certificates;
- If we have self-signed certificates, try to acquire staging certificates;
- If we have staging certificates, try to acquire regular certificates;
- If we have regular certificates, do nothing. We could try to update them, but this matters little: the update/renewal will be performed by a cron(8) job.
When installing a new set of certificates, we’ll need to systematically restart relayd(8) so as to force it to use the new certificates instead of the old ones.
There are two special cases to be considered when we’re setting up a new machine:
- we may have a set of valid, regular certificates, versionned and ready to be installed, thus allowing us to skip the whole process;
- if we don’t, then, as already mentioned, we need to generate a set of self-signed certificates.
sugar(1)
From the gathered information, we will now automate the setup with sugar(1), thought it could be automated with other tools. We will assume the reader to be familiar with the tool, either by having read the code (~150LOC shell) or by having followed this serie:
- On sugar, a sweeter Salt/Chef/Ansible/Puppet (1/5)
- On sugar, a sweeter Salt: documentation (2/5)
- On sugar, a sweeter Salt: one OpenBSD box (3/5)
- On sugar, a sweeter Salt: multiple systems (4/5)
- On sugar, a sweeter Salt: Annexes (5/5)
In order to proceed further, we’ll need a few setup scripts,
that will need to be called in a specific order (see the
setup.auto).
setup-rc.conf.local- Installs the
/etc/rc.conf.localselected byhook-pre-setup-rc.conf.local, thus ensuring that all the services (relayd(8), httpd(8)) are enabled.
- Installs the
setup-pf- Installs a configuration file
/etc/pf.confcreated byhook-pre-setup-pf, that ensures ports80and443are opened, while guaranteeing that the port is closed8080from the outside; - The setup is later checked by
hook-post-setup-pfusing the tests registered inpf.tests;
- Installs a configuration file
setup-relayd- Generates self-signed certificates for the demain described
in the general configuration if none are present, or install
the regular ones if any. The regular ones will basically
be a backup; they would be located as pair of
.crt/.keyfiles in$SUGARD/ssld/; - Configuration file and backup
.crt/.keyhave been prepared byhook-pre-setup-relayd;
- Generates self-signed certificates for the demain described
in the general configuration if none are present, or install
the regular ones if any. The regular ones will basically
be a backup; they would be located as pair of
setup-httpd- Most of the heavy lifting would have been performed by
the pre-hook
hook-pre-setup-httpd, so this that the setup script will merely have to install the configuration file and to (re)start httpd(8); - The post-hook
hook-post-setup-httpdcould be configured to perform automatic tests registered in thehttpd.testsfile;
- Most of the heavy lifting would have been performed by
the pre-hook
setup-acme-client- Certificate acquisition process itself. At this point, both relayd(8) and httpd(8) should be up and running.
- The configuration files would have been prepared by
hook-pre-setup-acme-client; - And the setup can be automatically checked (from the outside) by the
post hook
hook-post-setup-acme-client
setup-cron- Generic crontab(5) installation program. We’ll need an entry to regularly run acme-client(1) so as to update the certificates.
- Crontabs are prepared by the pre hook
hook-pre-setup-cron
The code should be rather straightforward given the content of this article,
we inline below a “key piece” of the puzzle, setup-acme-client:
#!/bin/sh

. `which sugar.lib`

log Asserting httpd is enabled...
assertenabled httpd

log Asserting relayd is enabled...
assertenabled relayd

log Installing 'acme-client(1)' secrets directory...
install -d -o root -g daemon -m 755 $httpd_chroot/$acme_dir

log Ensuring restricted permissions on /etc/ssl/...
install -d -o root -g wheel -m 755 /etc/ssl
install -d -o root -g wheel -m 700 /etc/ssl/private
chmod 0600 /etc/ssl/private/*.key

# Setup certificates via acme-client(1) using the provided
# configuration file, for the given domain.
#
# Input:
#	$1 : acme-client.conf(5) file to use
#	$2 : domain for which we want to setup certificates
#	$3 : grep(1) regexp to be matched against issuer
# Output:
#	Certificate issuer on stdout
setupcerts() {
	log Checking `basename $1`...
	quietrun acme-client -n -f $1

	log Updating/generating certificates for $2...
	quietrun acme-client -f $1 -Fv $2

	log Checking relayd.conf...
	quietrun relayd -n

	log Restarting relayd to use new certificates for $2...
	quietrun rcctl restart relayd

	# Meh: the ls is slow enough to get relayd started; the following
	# gettlsissuer fails otherwise.
	if ! rcctl ls started|grep -q relayd; then sleep 2; fi

	log Ensuring proper certificate issuer for given domain...
	x=`gettlsissuer $2`
	if ! echo "$x" | grep -q "$3"; then
		fail "setupcerts: unexpected issuer ($3):" $x
	fi
}

# Try staging setup, if there's either no certificate, or
# if we're using a dummy self-signed certificate created to start
# relayd (cf. './setup-relayd:/zhongmu.eu').
#
# Input:
#	$1 : domain name
# Output
trystaging() {
	if ! gettlsissuer $1 | grep -q 'Let.s.Encrypt'; then
		log Trying staging certificate first...
		setupcerts $SUGARD/acme-client-staging.conf $1 'Let.s.Encrypt.*STAGING'
	fi
}

# Try real real (non-staging), if we're currently successfully setup
# for staging.
#
# No-op if we already have genuine-certificates, even if they could
# be updated.
#
# Input:
#	$1 : domain name
# Output:
tryreal() {
	if gettlsissuer $1 | grep -q 'Let.s.Encrypt.*STAGING'; then
		log Trying real certificates...
		setupcerts $SUGARD/acme-client.conf $1 '/O=Let.s.Encrypt/'
	fi
}

skipec $SUGARD/tls.names | awk '{ print $1 }' | while read x; do
	trystaging $x
done

skipec $SUGARD/tls.names | awk '{ print $1 }' | while read x; do
	tryreal $x
done

log Installing acme-client.conf...
install -o root -g wheel  -m 600 $SUGARD/acme-client.conf /etc/acme-client.conf

log Installing backup-certs.pass...
install -o root -g wheel -m 600 $SUGARD/backup-certs.pass /root/.backup-certs.pass
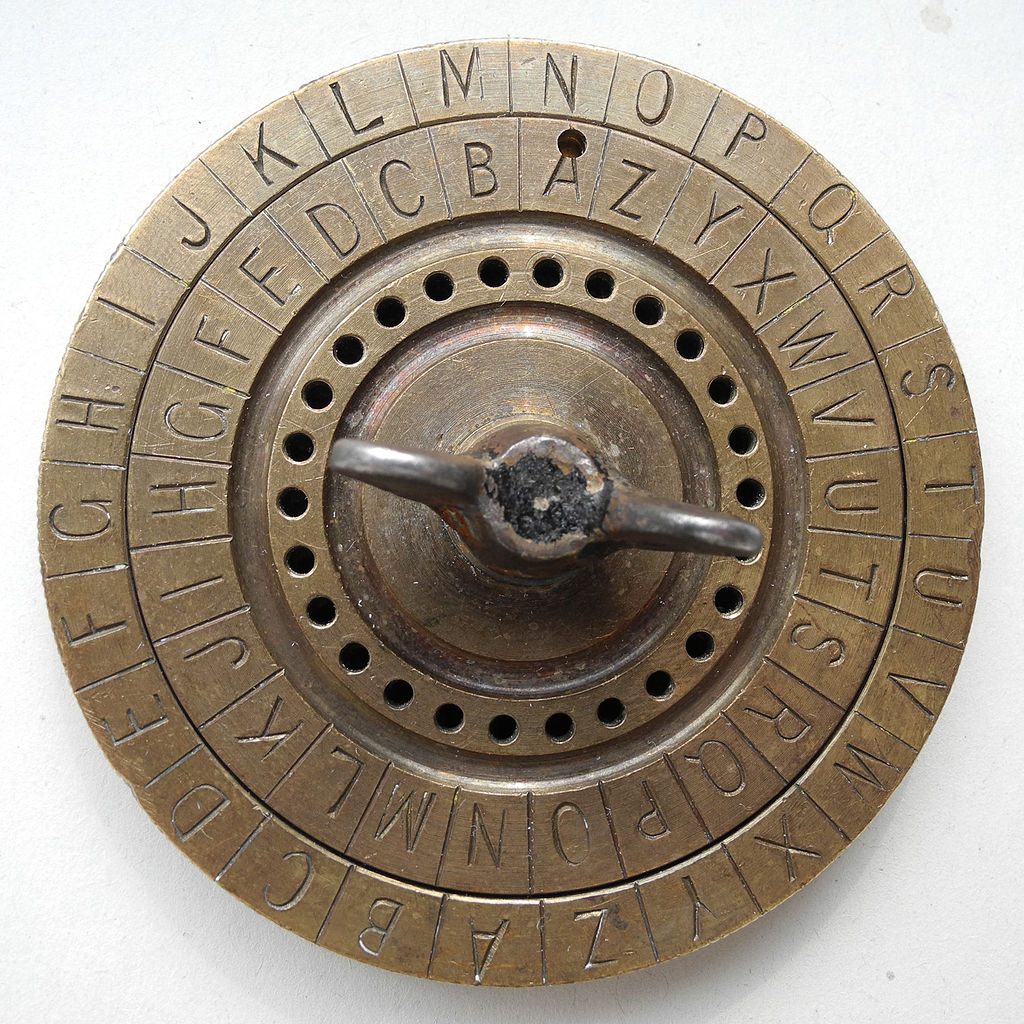
Cipher disc for substitution cipher, manufacturer: Linge, Pleidelsheim (Germany); see Caesar cipher
by
Hubert Berberich
At the end of the day, we should be able in one command to fully setup idempotently a mostly naked machine, get it to run a TLS guarded web server, and to automatically make sure that the setup has been reasonably performed:
$ sugar -s somehost setup
hook-pre-setup-rc.conf.local            : Preparing rc.conf.local for sync...
hook-pre-setup-pf                       : Preparing pf.conf for sync...
hook-pre-setup-pf                       : Ensure we have a backup ssh link...
hook-pre-setup-sshd                     : Preparing sshd_config for sync...
hook-pre-setup-sshd                     : Ensure we have a backup ssh link...
hook-pre-setup-relayd                   : Preparing relayd.conf for sync...
hook-pre-setup-relayd                   : Preparing tls.names for sync...
hook-pre-setup-relayd                   : Preparing relayd/tls.conf for sync...
hook-pre-setup-httpd                    : Preparing domain-base.conf for sync...
hook-pre-setup-httpd                    : Preparing www.example.com.conf for sync...
hook-pre-setup-httpd                    : Preparing httpd.conf...
hook-pre-setup-acme-client              : Preparing tls.names for sync...
hook-pre-setup-acme-client              : Creating acme-client-staging.conf...
hook-pre-setup-acme-client              : Creating acme-client.conf...
hook-pre-setup-cron                     : Preparing crontabs for sync...
setup-rc.conf.local                     : Installing rc.conf.local...
setup-pf                                : Asserting pf is enabled...
setup-pf                                : Installing pf.conf...
setup-pf                                : Checking pf.conf syntax...
setup-pf                                : Loading pf with new pf.conf...
setup-sshd                              : Asserting sshd is enabled...
setup-sshd                              : Installing /etc/ssh/sshd_config...
setup-sshd                              : Checking sshd_config...
setup-sshd                              : Restarting sshd
setup-relayd                            : Asserting relayd is enabled...
setup-relayd                            : Installing relayd.conf, relayd/tls.conf...
setup-relayd                            : Making sure we have at least a self-signed certificate for example.com...
setup-relayd                            : Checking relayd.conf...
setup-relayd                            : Restarting relayd
setup-httpd                             : Asserting httpd is enabled...
setup-httpd                             : Installing httpd.conf...
setup-httpd                             : Installing /etc/httpd/...
setup-httpd                             : Installing domain-base.conf...
setup-httpd                             : Installing mime-types.conf...
setup-httpd                             : Installing with-acme-challenges.conf...
setup-httpd                             : Installing www.example.com.conf...
setup-httpd                             : Checking httpd.conf...
setup-httpd                             : Restarting httpd...
setup-acme-client                       : Asserting httpd is enabled...
setup-acme-client                       : Asserting relayd is enabled...
setup-acme-client                       : Installing acme-client(1) secrets directory...
setup-acme-client                       : Ensuring restricted permissions on /etc/ssl/...
setup-acme-client                       : Installing acme-client.conf...
setup-cron                              : Setting up crontabs...
hook-post-setup-pf                      : Ensuring 255.255.255.255:22 is closed...
hook-post-setup-pf                      : Ensuring 255.255.255.255:80 is opened...
hook-post-setup-pf                      : Ensuring 255.255.255.255:443 is opened...
hook-post-setup-pf                      : Ensuring 255.255.255.255:8080 is closed...
hook-post-setup-pf                      : Close backup ssh link...
hook-post-setup-sshd                    : Ensure we can ssh to remote server...
hook-post-setup-sshd                    : Close backup ssh link...
hook-post-setup-acme-client             : Checking example.com issuer...
OK
Comments
By email, at mathieu.bivert chez: